Interested in Digital Painting? Here’s How to Get Started

Those of you who know me might be thinking, “Oh Monica does digital art?” But you’d be right to feel surprise or doubt. Because I don’t. Not since I was on Neopets and other virtual pet sites anyway, when I would put myself through the agony of trying to draw smooth lines with a mouse.

But I’m changing all that starting this week! Because I’ve had a tablet sitting around since August that I still haven’t learned to use. This birthday gift would have been the gift of my younger self’s dreams, so recently I’ve been trying to live that dream.

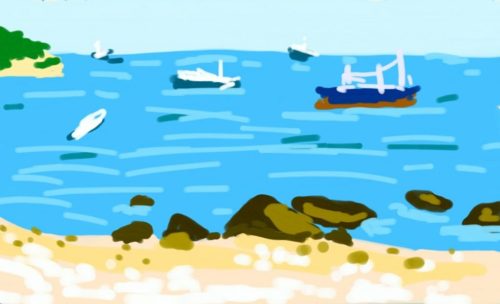
I started out confidently – a tablet will instantly make digital art so much easier, right? – but immediately fell short of my expectations. My drawings looked worse than some of my old computer mouse drawings. Take a look.

The age of Neopets (bonus points to anyone who can identify the other pet site):

Digital Painting yellow stuffed dragon painting on canvas while a stuffed cat watches

Digital Painting white mythical creature with a long tongue, long tail and four red eyes perched on a gray rock

I got pretty good at working around the limitations I had with my mouse. I also found some way to smooth out my shaky lines with some software (see white creature painting above), but now have no idea how I did that. In comparison, here’s my attempt from a few days ago:

Digital Painting roughly drawn smiling black cartoon cat with words "Graah! Why is this so hard?" scribbled on the left side

Amusing, but not so good. The only digital art I’ve done recently is the phone paintings I started making in Korea while waiting at bus stops or having reflective moments at the beach. This involved smooshing my finger around on my phone screen.

Digital painting phone painting of the beach with ships in the distance

Clearly, tablets and actual Photoshop have a bit more of a learning curve. That’s why, as a nearly complete beginner to digital painting, I’m writing a post on how to learn digital painting. Expert illustrators and artists who actually create digital art on a regular basis could easily give you a more comprehensive list of resources. But I’m in that same awkward beginner stage you might be, struggling to remember Photoshop shortcuts and figure out why I can’t draw like I do on paper.

Here’s a list of the resources I’m currently using – and really liking so far! Most of these are geared toward learning to use digital software, not art skills, since that’s what I need. But you can check out my post on figure drawing resources or beginner art tutorials (skip to #6 for drawing) if you need the foundation in art techniques too.


Digital Painting Tutorials

This is a list of four specific resources, as well as a few general recommendations, for a beginner learning digital painting. Most are basic tutorials, but a few scale up in difficulty so more advanced artists might find a few gems here too.


Ctrl+Paint

Ctrl+Paint is my favorite with absolutely no competition at this point. The website is an extensive video library of tutorials starting from the very beginning and going to- well I haven’t gotten anywhere near that yet. The creator, Matt Kohr, has crafted a clear curriculum that thoroughly takes you through all the essentials you need for digital painting.

The site itself looks appealing with a very clean layout and intuitive navigation. A nice-looking site just makes you want to stay a while, doesn’t it? There are no ads on Ctrl+Paint because Matt makes his revenue from selling videos of more advanced techniques or in-depth tutorials. Since I haven’t been using the Ctrl+Paint that long, I can’t say how long it’ll take to get through the free videos…but there are a LOT. And on top of that, Matt still posts new videos. As of this post, the last free video was posted on August 21, but before that there’s at least one new video each month.

Even though I gathered a handful of beginner resources for this post, Ctrl+Paint is the one I anticipate using the most. The videos are brief, which is perfect for my plan to spend 30 minutes a day on digital painting (I’m attempting Nanowrimo and applying for grad school, okay? But carving out 30 minutes each day sounds doable). By the end of each video, you have an “assignment” to practice, whether that’s a file he’s given you to mess around with or a tool to become comfortable using. The nice things about these assignments that they don’t feel like work so far. You just play until you get the hang of it.


Lummage’s Comic Book Coloring 101

If you’re looking to master digital coloring, Lummage’s series might be for you. I liked the first video, and I think I’ll continue with this course after I’ve seen what Ctrl+Paint has to offer on coloring. As a side, “coloring” reminds me of elementary school and coloring books, so if that bothers you too, think of it as just the color part of digital painting.

Like Ctrl+Paint, Lummage’s video series is for beginners. While this series is titled “Comic Book Coloring,”  the techniques taught apply to any type of digital painting. And if you’re a beginner like me, any foundational tutorials are useful anyway.

Lummage videos are a bit longer, depending on the complexity of the topic covered. They range from 8 to 25 minutes, so you’ll need to carve out more time for later lessons. The end of each video has assignments too, beginning with the very basic, practical skills needed to become comfortable working digitally. I excel at pushing my way through all the requirements of a course, but after watching the first video in this series, I have to say, these assignments sound like a lot of work. Of course learning a new skill, even an artistic one like digital painting, is work, but Lummage provides no fluff to disguise it. He provides everything you need, but it’s up to you to put in the practice. I’m  appreciative of his approach, while simultaneously groaning on the inside at how much work this course looks.


CG Cookie Concept

CG Cookie Concept is another general resource for digital artists. They have a much greater range of videos than either Ctrl+Paint or Lummage. You can also find videos not only on digital techniques but art skills.

What I like about Cookie Concept is how there’s nothing too basic for them to cover. Their video explaining how to scan an image so you can use it in Photoshop begins with a clip of someone placing the paper into a scanner and pushing a button to scan it.

While I didn’t need any help with that part, I can see this being useful in later videos. They don’t assume you know where a tool is. Instead they open up the menu that has that tool so you can see it. These moments are pretty brief – CG Cookie is never going to bore you with extensive explanations. It’s not like having that one person in class. The one who’s constantly asking questions. And forcing the rest of the class to listen to the same explanation over and over again. Instead, they just take a brief second to show you everything you need to know. I’m pretty sure that as I get further into their lessons and there’s more and more to remember, I’ll appreciate the brief reminders that keep me from pausing a video and Googling a tool I can’t remember how to find.


Tyler Edlin’s Brush Sauce Theatre

The last specific resource I’ll spotlight at this point is Tyler Edlin’s YouTube channel, and specifically the Brush Sauce Theater playlist. Tyler Edlin is a concept artist and freelance illustrator. His tutorials are pretty different from the rest of the resources on my list and definitely far more advanced.

The Brush Sauce Theatre videos cover a variety of topics that mix digital skills and art techniques. Some videos discuss how to approach value or choose your painting composition; others address specifics like creating texture in a digital painting. I wouldn’t go to Tyler’s videos for the basics, but I include his work as something to aspire to and to keep me in the mindset of producing art.

As I’m learning a new skill, I like to look ahead and see what’s possible with the medium. There are countless digital artists I could follow for this, but Tyler Edlin provides a bit of high-level art instruction. His videos keep me thinking about art technique and not just basic skills. For example, drawing the correct proportions on the human figure or using different brush tools are basic skills. In contrast, composing a balanced painting is a high level, or “high order” concern. If we compared this to writing an essay, it would be the difference between using proper grammar and having a clear thesis.

Tyler does a good job of integrating art and digital skills, so when I’m watching his videos, I’m not only thinking about the digital aspect of his work but the art techniques he applies to get there. I suppose it also reminds me that I’m not starting completely from scratch with digital painting – everything I’ve learned about art still applies. I anticipate picking and choosing from his tutorials after I’ve established more of a foundation with other resources.


General Resources for Digital Painting

That’s the end of the specific artists I’m following to learn digital painting, but there are a few general resources worth mentioning.

YouTube

Everyone recommends YouTube. It’s just easier to learn a visual craft from a visual source. Even though I’m all about blog posts, it’s so helpful to watch an artist construct an image and explanation what they’re doing at the same time.

Pinterest

Surprisingly Pinterest also has a wealth of information on digital art. Search for the digital art tutorial of your choice, and Pinterest will probably lead you to it. The benefit of using Pinterest over a general Google search is that you’ll end up with tons of infographics that clearly layout techniques step by step. All of the other resources on this list have been video-based, but if you’d prefer to learn from images, Pinterest is perfect.

Tumblr is similar, but I’d go to Pinterest first since it’s easier to scan through your options and choose the tutorial you like best.


Tools: Photoshop Substitutes

Finally, I’ll include a brief note on tools. I bought Photoshop CS5 as a college student and it’s worked fine for me ever since. But if you’re not willing to make the investment, there are still ways to try digital painting. Gimp and Krita are free, open-source Photoshop alternatives. Most tutorials online use Photoshop, so just expect a learning curve with the controls. Or seek out some Gimp- or Krita-specific tutorials. After all, you can learn anything on the Internet.


This is just a snippet of the many, many tutorials and resources online. YouTube alone has thousands of illustrators who share their methods. Do you have a favorite YouTuber or platform to learn digital painting? Let me know! (Because as a beginner, seriously, I want to know.)

Sketches by Phone: Colorado Springs

Originally the title of this post was going to be Sketches of Home, but I liked the rhyming alternative better.

Home life is pretty dull compared to travel, but art can help you see a place through new eyes. This is a glimpse into the surroundings of my current, strangely-domestic stage of life.

Sketches of dogs asleep on my bed; my neighborhood street

pikes-peak-mountains

Pikes Peak from the Grand Overlook in Palmer Park.

starsmore-trees_001

Trees at a trail behind the Starsmore Discovery Center

Backyard view; Colorado Springs in the distance

There’s no ocean, but I guess it is pretty beautiful out here.

5 Ways to Attack Art Block

Maybe I’ve already written a lot about art block. But just because I’ve defeated it once doesn’t mean it I won’t struggle with it again. And again. And again. In general though, there are some tricks that have and still do help me get through a slump.

When I’m feeling unmotivated and talentless – because confidence and skill self-esteem are definitely tied to my artistic dry spells – the first thing I try to do is…

1. Draw what’s in front of you.

Yes, this might sound boring. I’ve done more sketches of coffee mugs and pencils than I’d like to admit. But when I’m not feeling creative, I remind myself that drawing from real life is still art. It’s something I can start almost mindlessly, even if internally I’m grumbling about how the subject matter is boring, that there’s nothing interesting in my room or my house or my city. Sometimes though, I’m lucky enough to get caught up in process of creating something. That look of annoyance on my dog’s face. The little Pokemon figurine that brings me nostalgia. The way light and shadow fall on a blanket – how do I best capture that, without worrying that I can’t?

Drawing what’s around me also has the benefit of forcing me to focus on skill. Since there’s nothing compelling about a coffee mug in front of me, I focus on just making it look good. Maybe I try to make it as realistic as possible. Maybe I’m just noticing where the shadows fall today, in this lighting. Maybe I like to imagine that in doing this repetitive exercise, I’m not in a creative block, but just conducting an exploration of light and colors, like Monet and his haystacks.

But if drawing what’s in front of you still seems boring you could…

2. Use new media.

When I’m testing out a new medium, it doesn’t really matter what the subject matter is, I’m just trying to get the feel of for the medium. It can be a good way for me to get lost in art instead of worrying about the quality of what I’m producing. Here’s a quick list of ideas; I’ll go into some of them in more detail.

paint

  • Digital
  • Real pen and ink
  • Scratchboard
  • Paint (watercolor, oil, acrylic, tempura, coffee)
  • Colored pencil
  • Pastels
  • Charcoal
  • Collage

Digital

For me, the apex of trying something new would be going digital. I’m way out of my element with digital painting, but it’s fun and easy to do at any time. No special supplies needed. So one day while fiddling around on my phone, I started to paint – you guessed it – a coffee mug. It held my interest because there were so many brushes and a cool color-mixing tool to try out.

Never mind that the sample paintings in the app were like the one on the left, while mine was the one on the right:

Dip (or Nib) Pen and Ink

Nowadays people use cartridge-filled pens; they’re easier, offer more control, and don’t require constantly having to dip a pen into an ink pot. Dip pens can be fickle, sometimes leave blotches, and don’t always create the line you want. But here’s a secret: in the world of fine art, dip pens are seen as more legitimate. I’m not going to argue for or against that point, but there’s something fun about using an old-fashioned dip pen. So why not try it and feel more legit too?

Well, you may or may not feel more legit on your first attempt, but you still might feel instant gratification from trying something cool and new.

Scratchboard

Most people aren’t familiar with scratchboard, or they think of that cutesy craft they did as a kid where you scratch away the surface of coated paper to reveal a rainbow or some silliness underneath. Yeah yeah. I guess that’s scratchboard. But there are some seriously amazing professional artists using scratchboard too. Heather Lara, for example, whose detailed work contains an incredible level of realism.Or Keely Dolan, who creates riveting fantasy and mythology-inspired illustrations.

Scratchboard does take a long time, and it’s tricky since you have to think about lighting in reverse, but it’s so much fun. At the very least, it’s a great way to focus on detail and value.

It might be a little harder to find scratchboard or scratchboard paper, but you can also make your own by coating some stiff paper with ink. There are scratch tools intended for scratchboard – they look like dip pens and have a variety of different nibs – but you can also use an exacto knife or experiment with other objects, like paper clips or spare change.

Paint

There are so many kinds of paint: watercolor, oil, acrylic, tempera. Even if you’re an artist by trade, I’m willing to bet there’s some type of paint out there that you haven’t mastered. Why not try a new one?

Watercolor is the most accessible, with cheap sets available almost everywhere. The materials are as basic as you can get – just add water. However it’s often been called the most difficult type of paint to master, leaving you plenty of room for improvement.

And what about non-traditional paints?

Coffee seems to be gaining popularity, and for years I’ve been following an artist who creates art O Ka Fee (with coffee).

3. Be messy.

This is where my own biases come into play. My art tends to be very detailed and tightly-controlled. Loose, abstract art is the bane of my existence. Okay not really. I just really struggle creating it. So for me, it helps to try letting loose because it’s so opposite to what I’m usually doing.

Maybe you’re already a loose kind of artist, and in that case, I don’t know if being strict and detailed would be helpful or frustrating…but when you’re stuck, anything’s worth a try.

Another component to being messy though, is to not worry about how your art turns out. Create simply for the purpose of creating (or if you must, practicing). Give yourself space to do art that is private, free from the expectations and judgments of others.

4. Try different times of day.

By accident, I discovered that I really like doing art in the morning. It’s a nice way to start the day before I become sucked into the world of screens and blue light and headaches. But other days, I’ve really gotten sucked into an art piece at night, working for hours without realizing how much time has gone by.

What about you? Maybe you’ve been trying to work in the afternoon, but you find that actually your art brain is really awake in the morning. Or maybe it depends on the day. I’m still experimenting to find that sweet spot.

5. Find other artists.

Human beings are social creatures, and artists, despite popular belief, are the same. Finding other artists around you has a whole host of benefits, from forcing you to feel accountable to providing mutual encouragement and inspiration.

If I were given this tip though, I can easily imagine myself groaning and grumbling. You mean I have to go out and find people? How am I supposed to just find an art community? But the great thing about living in 2016 is that finding a community as simple as logging onto Tumblr. If you engage and put yourself out there, others will respond.

I still think real life interaction is important, but being in touch with other artists from the comfort of your couch is pretty swell too. And at the very least, well, you can browse through plenty of pretty art and get inspired.

Bonus: Don’t be too hard on yourself.

Some of these tips might not work as well for you. I get the feeling that over time what works for me will change and evolve as well. But dry spells will inevitably be part of any creative’s life.

Creating art is an amazing work, but it also involves an amazing amount of hard work. It’s not only about skill. I only heard this idea put into words recently, in a quote from Joan Erikson, quoted in Composing a Life by Mary Catherine Bateson:

“You have to have a certain basic trust that you can do this – you are going to do this. You have to have will, you have to have imagination enough and fancy enough to do it your way, to make it unique. You have to have confidence, identity, and so on.”

Artist, your work takes more than anyone other than you can know. But what I do know is that the world needs your creativity.

Art Abroad 2: Art Block Broken!

So my first year in Korea wasn’t very artistically productive. It was more of an art drought.

But my second year, I resolved, would be different! And generally it was, although my first few months started off not unlike my previous year. I’d recommitted to doing art, but like my first year in Korea, I was at a new school with a new homestay in a new city, and life was distracting.

Mostly, I was concerned about making a good impression on my new coworkers and students. The new city that didn’t cause me any concern though…because I was placed in BUSAN!

busan-tower-view

This was actually a dream come true. And yes, I know this is supposed to be about art, but you’ll have to bear with me while I rave about Busan first. So…

Dream. Come. True.

I’d wanted to be placed in Busan from the very beginning. Well, that’s not entirely true. At first I arrived in South Korea with no expectations, knowing that I wouldn’t get to choose my placement and it was pointless to set my heart on any particular place. That mindset didn’t last long. My peers had preferences all right, and were determined to get them. The more we talked about their preferences, the more I thought about mine, and the more appealing Busan became to me.

Why Busan?

I chose to teach English in Korea (not Japan or Malaysia or Taiwan) in part to meet my extended family. All of my mom’s family still lives in Korea, but I’d never been able to see them. And most of them lived in Busan, including my grandparents. Why wouldn’t I want to go to Busan? It was also my mom’s hometown and undoubtedly full of memories.

Plus, Busan was pretty popular. It’s the second largest city in Korea,meaning it has nearly all the conveniences of Seoul (Costco, western style restaurants), without the crowds and pollution (I’m biased – can you tell?). Busan is also a coastal city with seven beaches, multiple famous fish markets and general awesomeness.

So this year I was doing a lot of exploring and not a lot of art. But the thing about living in a beautiful place is that you can’t help but get inspired at some point. Remember when I turned down a coworker‘s suggestion to do landscape art? Well, that was before the ocean happened to me.


“I just wanna draw the ocean all day.”

Being from Colorado, I’ve always preferred mountains. This may have been influenced by the fact that I’d only been to the beach once in my life. Busan opened my eyes. Being constantly surrounded by the ocean – really though, my school was on an island – all I wanted to do was sit by the sea. My daily commute took me right along the shore, so I’d rush onto the bus everyday, hoping to get a seat on the right side of the bus, where I’d have a front row view. Sometimes I wished I didn’t have to get off and go to school.

I felt like I could just sit and watch the ocean for hours. I began to think “I just wanna draw the ocean all day.” So much for not doing landscapes.

But it was still hard to find time for art. A new school meant new students, new coworkers and new expectations, both in the office and the classroom. None of it was bad; it just took a lot of energy as I learned what worked and what didn’t. I never felt like going through the effort of pulling out paints and brushes, and then finding a spot where I wouldn’t be disturbed.

No art was created. Yet.


Ta-Da! Technology

I took the bus a lot in Busan which, unlike the subway, involves a lot of wait time. One day, during an especially long wait, I started playing around with a memo app on my phone, just as a way to practice color.

And hey, it was actually kind of fun. Even if my first effort was horrendously ugly.

s-memo
Lanterns hung for Buddha’s birthday

I did another one of these mini digital paintings of the view from my office, this time not at the mercy of the bus’s arrival. It wasn’t so bad, although when I showed a coworker I made many excuses about how it was rough because I’d been using my finger to draw, but how it still wasn’t too bad right?

s-memo_01

(Hint: Showing your artwork to a non-artist is almost always a confidence booster.)

And from that point on, I was addicted. Bam! Code cracked. Art block busted. Doing art was easy and fun again. I didn’t have to gather any supplies – all I needed was my phone, which never left my side anyway.

I feel silly that it took me this long to start making use of technology in my art.


Landscape Takeover

I know what you’re thinking now – or at least, what I was asking myself – didn’t you do any other art? Well yes, yes I did.

Keeping with my anti-landscape theme, I did physical landscape paintings as well. They were really small goodbye gifts to a few people before I left Korea.

landscape-gift


Family

And seeing as my family was a big highlight during my time in Korea, they got a few pages in my sketchbook.

avid_reader
Avid Reader, pastel, conte, and pen


Final Project

Of course I once again had to impose some big project on myself before the year ended. In my first year, I gave myself the task of drawing everyone in the Fulbright Korea program plus our directors – 117 faces in all – and finishing it in time to be published in our literary magazine. In my second year, I hoped to exhibit my final project during Fulbright Korea’s Final Dinner – but if you have no idea what this is, I won’t give it away yet! Here’s spoiler though; it involves lots of these:

coffee-cozies